Sidebar
Table of Contents
Live map

While the map screen is shown your mobile device will for your convenience not automatically switch off any longer. You have to leave this screen in order to return to automatic (timed) switch-off for power conservation. Of course, manually switching on and off your mobile device still works as usual.

Top Bar Menu
The icons shown in the top bar and the contents behind the overflow menu button are distributed dynamically based on your device resolution and screen orientation. Thus it might be possible, that more or less items can be found behind the menu button or instead shown as icons in the top bar on your device.
In case a menu entry is shown as an icon you can long press the icon to get a popup showing its function.
| Icon | Function | Description |
|---|---|---|
 | Map info | Shows the current map status: Live Map in case the map is live, Map if live update is disabled or the name of a list which is shown on the map.Furthermore the amount of caches visible on the map is shown. |
| Map settings | This button is shown on bottom center of the map and will open a quick settings menu containing several options to customize the map display (e.g. hiding of certain elements). | |
 | Progress spinner | A small blue line directly underneath the title bar is shown as progress indicator while the live map is loading data from the geocaching servers and/or from your cache lists. It will disappear if the live map has finished loading. |
| Center Position | This button can be used to center the map on your current position. If the map is centered to your position a filled icon is shown. |
|
| Map Source Selection | Use this button to change the active map source If visible in the top bar, a long tap will choose the last used map source. |
|
 | Filter | Tapping this icon will open a filter dialog to filter the caches on your map according to various criteria. If visible in the top bar, a long tap will open a list of the stored filters to change the active filter. |
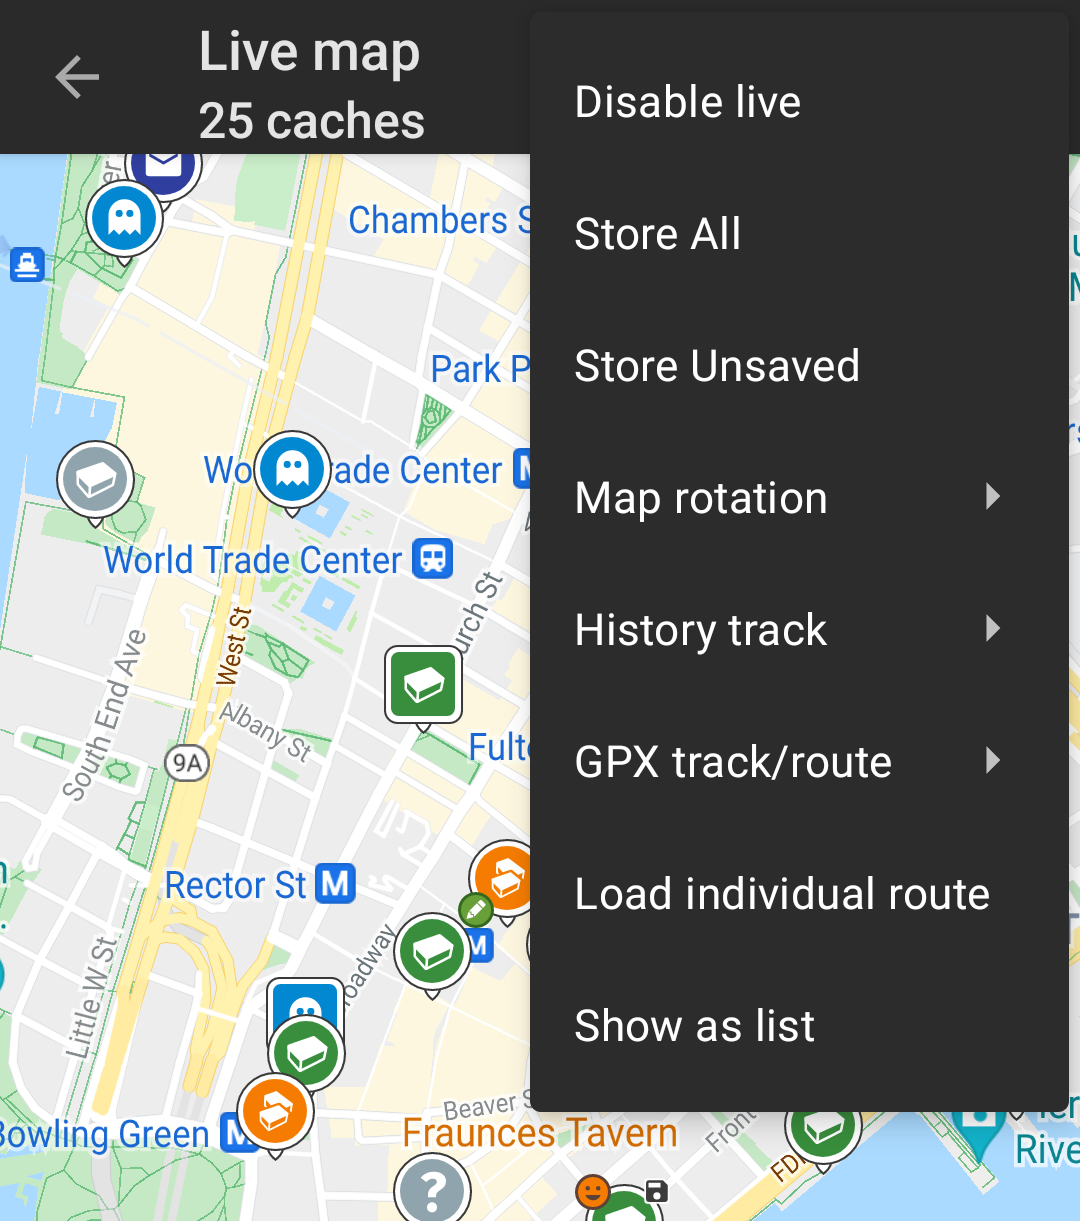
| Overflow Menu Button | Tapping here will open the menu of functions not fitting into the top bar on your device, thus being displayed as a list instead. The function shown in this list are also described in this table. | |
| Enable/disable live | This function turns the live map update on/off. If the live map is disabled, the slashed icon is shown. Long tap will activate plain offline mode. |
|
| Store all | Saves all caches shown on the map onto your stored caches list. Caches already stored will be refreshed during this process. | |
| Store unsaved | Saves all caches shown on the map, except the ones already stored, onto your stored caches list. | |
| Map rotation | This will open a menu to switch rotation of the map according to device heading off/on or enable manual rotation. This function is currently only available for Google Maps. This function is currently only available for Google Maps. If the rotation is not switched off and the compass rose is shown on the map, a long tap on the compass rose will also show the options to switch rotation of the map. |
|
| History track | Opens a sub menu containing option to show/hide, clear and export the history track (the history of your movement). | |
| GPX track/route | Allows you to load/unload and show the content of a GPX track/route file on the map. | |
| Individual route | This will open a sub menu to manage, load or hide an individual route, which you created by long tapping elements on the map. The long tap function needs to be enabled in map behavior settings. | |
| Show as list | This will display all caches shown on the map as cache list. |
Map content
The map will use your selected map type and show a live view of all available caches on the displayed location.
The live map always shows a combination of caches loaded live from all your enabled geocaching services as well as caches stored in your cache lists.
Tap on the following links to get information about the Geocache Type Icons in c:geo and Geocache marker icons in c:geo, which are used throughout c:geo.
Map popup window
If you tap on a cache icon on the live map the following popup windows will be shown above the map, providing additional information for the selected cache:
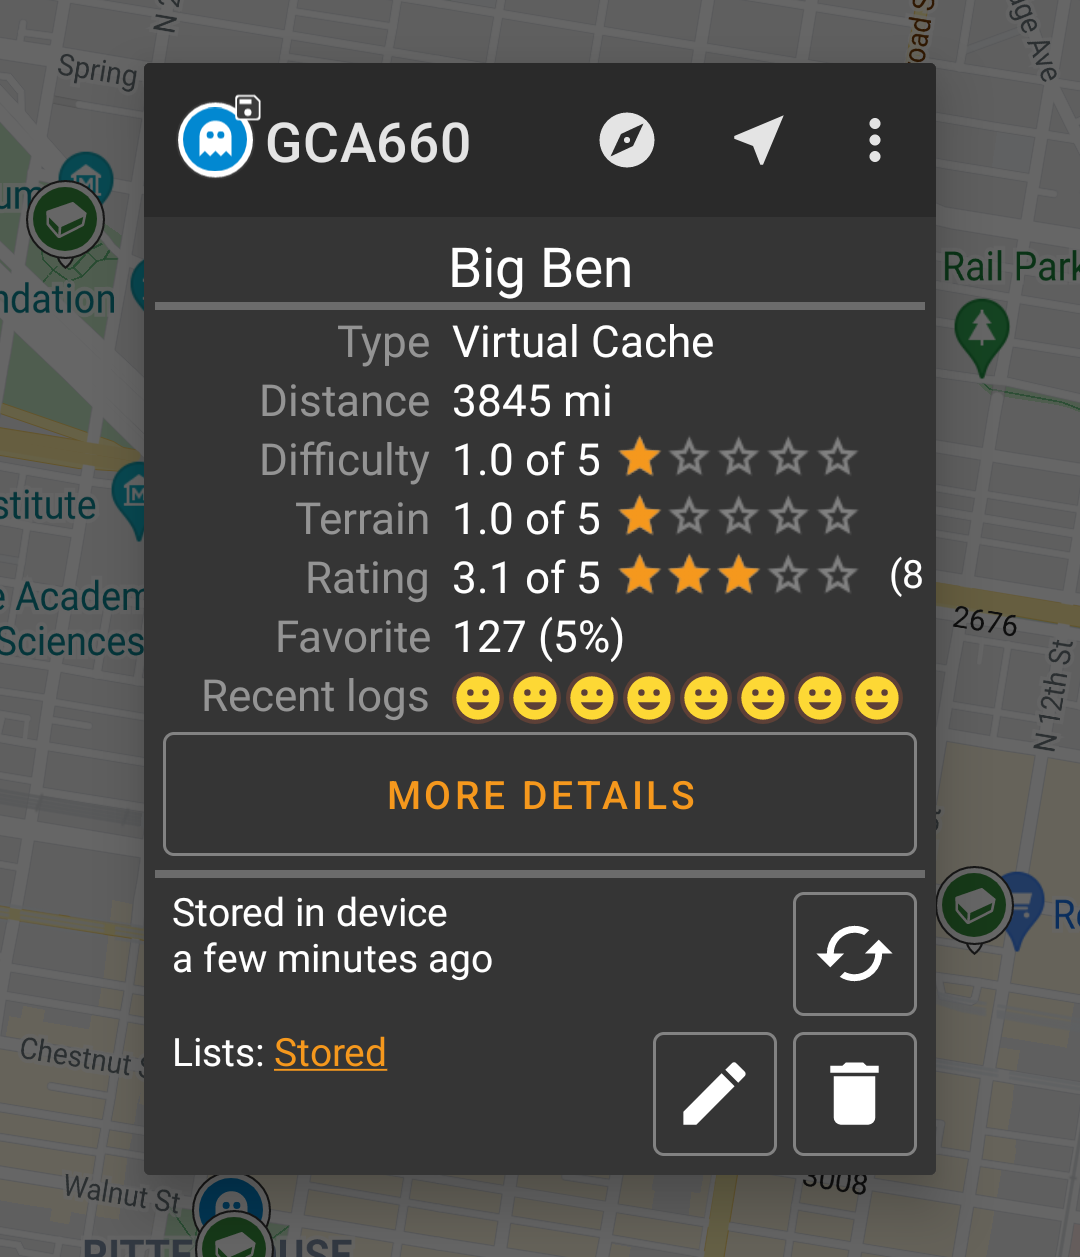
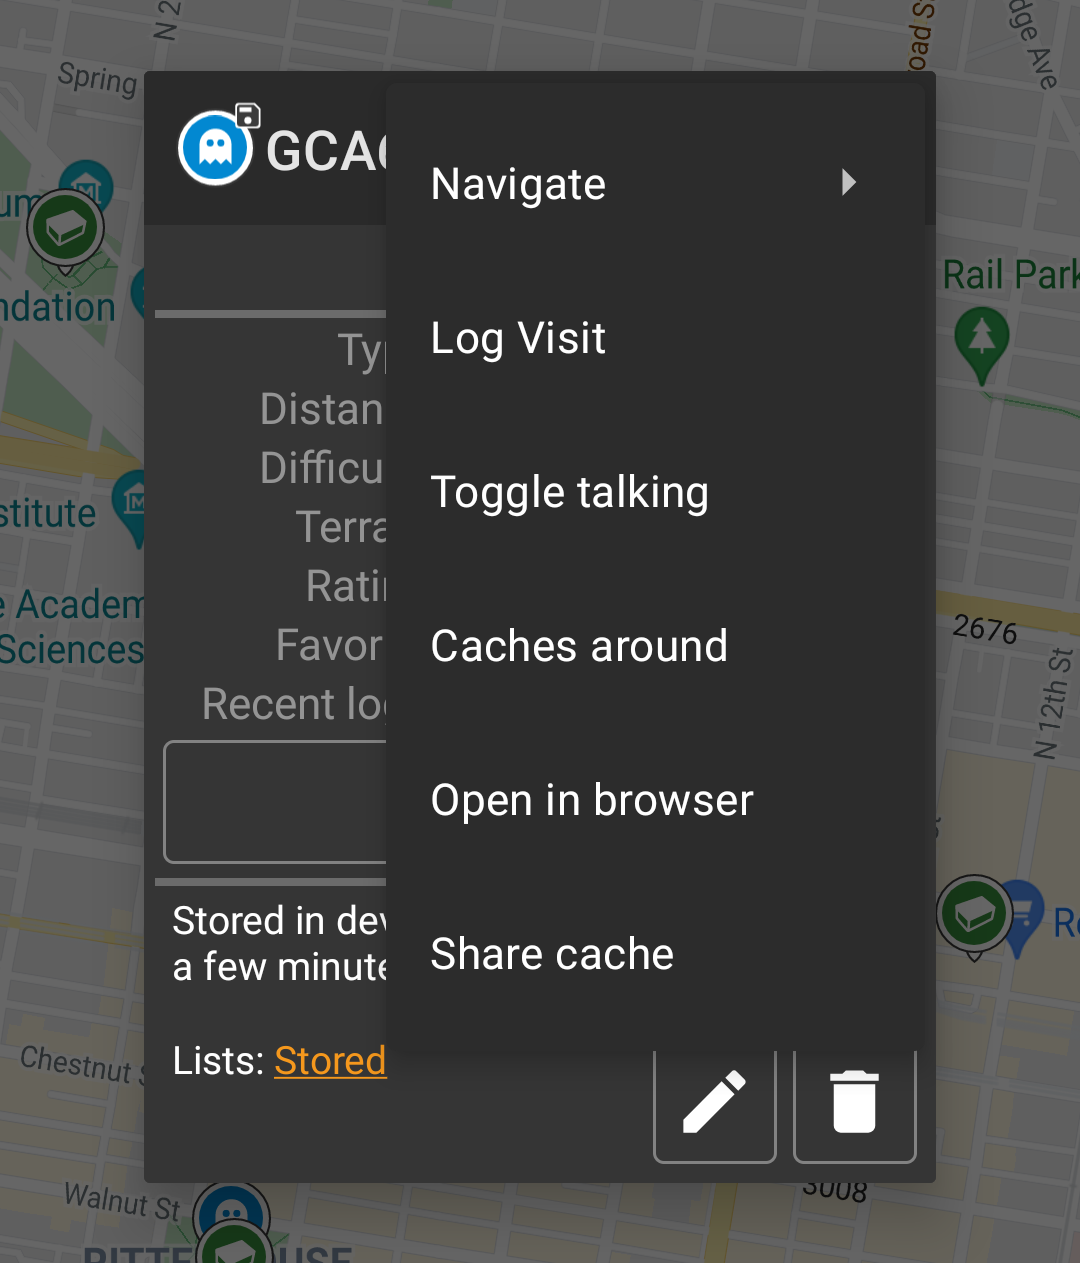
Top section
This section of the map popup provides several menu options concerning the selected cache.
| Icon/Option | Description |
|---|---|
 | Showing the Cache type icon and the geocode of the selected cache. Tap on the title allows to set a user defined icon for this cache, which replaces the default cache type icon ( Set cache icon). |
| A short tap on this icon will start your default navigation tool to navigate to the selected cache. A long press will start your secondary navigation tool. |
|
| This options turns on/off the direction line/routing between your position and the position of the selected cache. | |
| This option opens a menu list with additional options also described in this table. | |
| Compass | This opens the compass for this cache. |
| Navigate | This opens the list of all available navigation tools to start one of them for this cache. |
| Log Visit | This opens the logging window to log the selected cache. |
| Toggle talking | Will start or stop the text-to-speech output of direction and distance towards the target. You can also switch off the display once talking function has been started. |
| Caches around | This option starts a nearby search around the coordinates of the selected cache and will display the results. |
| Open in browser | This option opens the cache listing on the geocaching web page using your internet browser. |
| Share Cache | Will share a link to the cache using the built-in Android share options. |
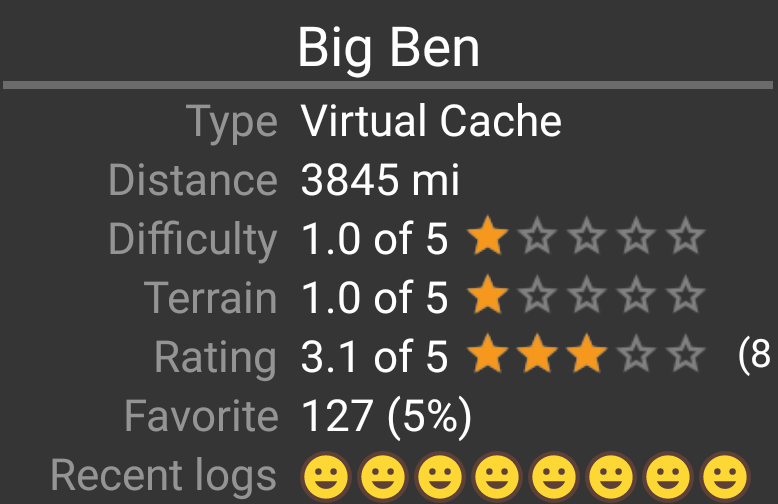
Cache information
The middle section of the map popup window shows helpful information about the selected cache. Some of the information might not be shown depending on the loading status of the selected cache (e.g. due to the loading strategy).
| Heading | Description |
|---|---|
| Type | Type of the selected cache. |
| Geo code | Geo code of the selected cache. |
| Distance | Distance to the coordinates of the selected cache from your current position. |
| Difficulty | Difficulty rating of the selected cache shown as decimal value as well as graphical. |
| Terrain | Terrain rating of the selected cache shown as decimal value as well as graphical. |
| Rating | Shows the quality rating of this cache from GCVote if this service is enabled in the c:geo settings as decimal value as well as graphical. The value shown in parenthesis is the number of votes given for this cache. |
| Favorite | The amount of favorite points (geocaching.com) or recommendations (Opencaching platforms) the selected cache has been awarded. The percentage value is the amount of favorite points divided by the number of total finds. |
| Recent logs | Will visualize the log types of the most recent logs for this cache (newest on the left). |
| More details | This button will take you to the cache detail page of the selected cache providing the full information for this geocache. |
| This button is only available if the cache as a owners hint or a personal note stored. Tapping the button will display the hint and/or personal note at the bottom of the popup window. |
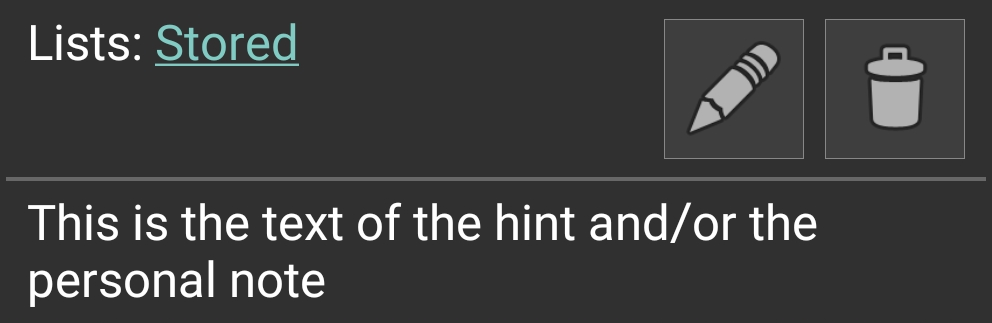
List managegment
This section of the map popup provides several options to manage the storage state of the selected cache.

| Icon/Option | Description |
|---|---|
 | This field provides information if the selected cache is stored on your cache lists and for how long the cache is stored (i.e. gives you an indication of how up-to-date the shown details are). |
| Tapping this button will refresh the cache information by updating it from the geocaching server. | |
 | In case the selected cache is already stored in your cache lists this field shows you the list(s) it is stored in. |
| This button is only shown if the selected cache is not yet stored in your cache lists and will store it. A long press on this icon will store the cache to the last used list, instead of asking for the list. |
|
| If the selected cache is already stored in your cache lists this icon is shown and allows you to modify the list or add the cache to another list. | |
| If the selected cache is already stored in your cache lists this icon is shown and allows you to delete the cache from your lists. |
Hint/Note section
If you tapped the hint button in the cache information section of the popup window, the owners hint and/or your personal note will be shown at the bottom of the popup window. In case of a long text you can scroll this part of the popup window.
Map quick settings
After selecting the quick settings button, which is shown on bottom center of the map the following settings screen will be shown:

| Category | Description |
|---|---|
| Show caches | Toggle whether caches are shown on the map depending on their current state. The settings used here will automatically be applied as a live filter. |
| Show waypoints | Toggle whether whether waypoints are shown in the map depedning on their type or state. |
| Show other | This section contains options to hide other elements on the map. |
| Use compact icons | With this option you can switch from the classic cache icon view to a compact view showing single caches as a colored dot only. You can set this feature to on/off and automatic mode. The automatic mode will toggle between classic and compact view depending on zoom level. |
| Routing | Here you can select the desired routing mode used to draw the direction line between your position and the chosen target cache/waypoint. Either no line, a straight line or turn-by-turn navigation for pedestrian, bike or car can be used. Turn-by-turn navigation requires an activated and configured BRouter setup. |
| Individual route | You can select to automatically set the start point of your individual route as target for the direction line. This item is only shown if an individual route is present on the map. |
Route/Track settings

Map navigation
c:geo provides several options to help you with navigation using different lines drawn on the (live) map:
- It can show a direction line between your position and a chosen target cache/waypoint.
- You can load an GPX track/route, which will then be shown on the map.
- You can set an individual route between several caches/waypoints.
- c:geo can optionally draw a history track showing the position history (your movement) on the map.
To get the most out of the direction line and individual route it is recommended to use BRouter as described in the linked section of our user guide. This will enable routed lines instead of just a straight connection line.
The different line and track types are described in more detail below.
Direction line
The direction line is a map line which connects your current position with a chosen target cache/waypoint. This can be either a straight line or a routed line if you have configured BRouter.
The default line color is red but line color and additional appearance parameters can be configured according to your needs within the map line customization settings.
The example below shows the typical appearance of the direction line (with and without Brouter).
| Direction line without BRouter | Direction line with BRouter |
|---|---|
 |  |
There are two ways to activate the direction line:
- Tap on a cache, which is shown on map, and activate the direction line with the corresponding icon
 shown in the map popup.
 - From cache details menu use Navigation - Map to open the map including direction line.
GPX track/route
You have the possibility to load a GPX track/route file which is then shown on the map. For example cache owners might provide a GPX-track/route file to follow a certain route to find a cache, or you can generate such GPX track/route with other routing tools. Tracks and routes both are basically GPX files, one having a recorded track of positions (track file), the other (route file) only some waymarks, for which c:geo will route you from point to point.
The default line color is green but the line color and additional appearance parameters can be configured according to your needs within the map line customization settings.
The example below shows the typical appearance of an individual GPX track/route.

To load or unload a GPX track you have to use the map menu items below GPX track/route in your map menu:

| Menu item | Description |
|---|---|
| Load track/route from GPX | Allows you to select a GPX file containing a track or route to display it on the map. |
| Center on track/route | Will move/zoom the map, so that an already loaded track/route is shown completely. |
| Unload track/route | This will remove the loaded track/route from the map. |
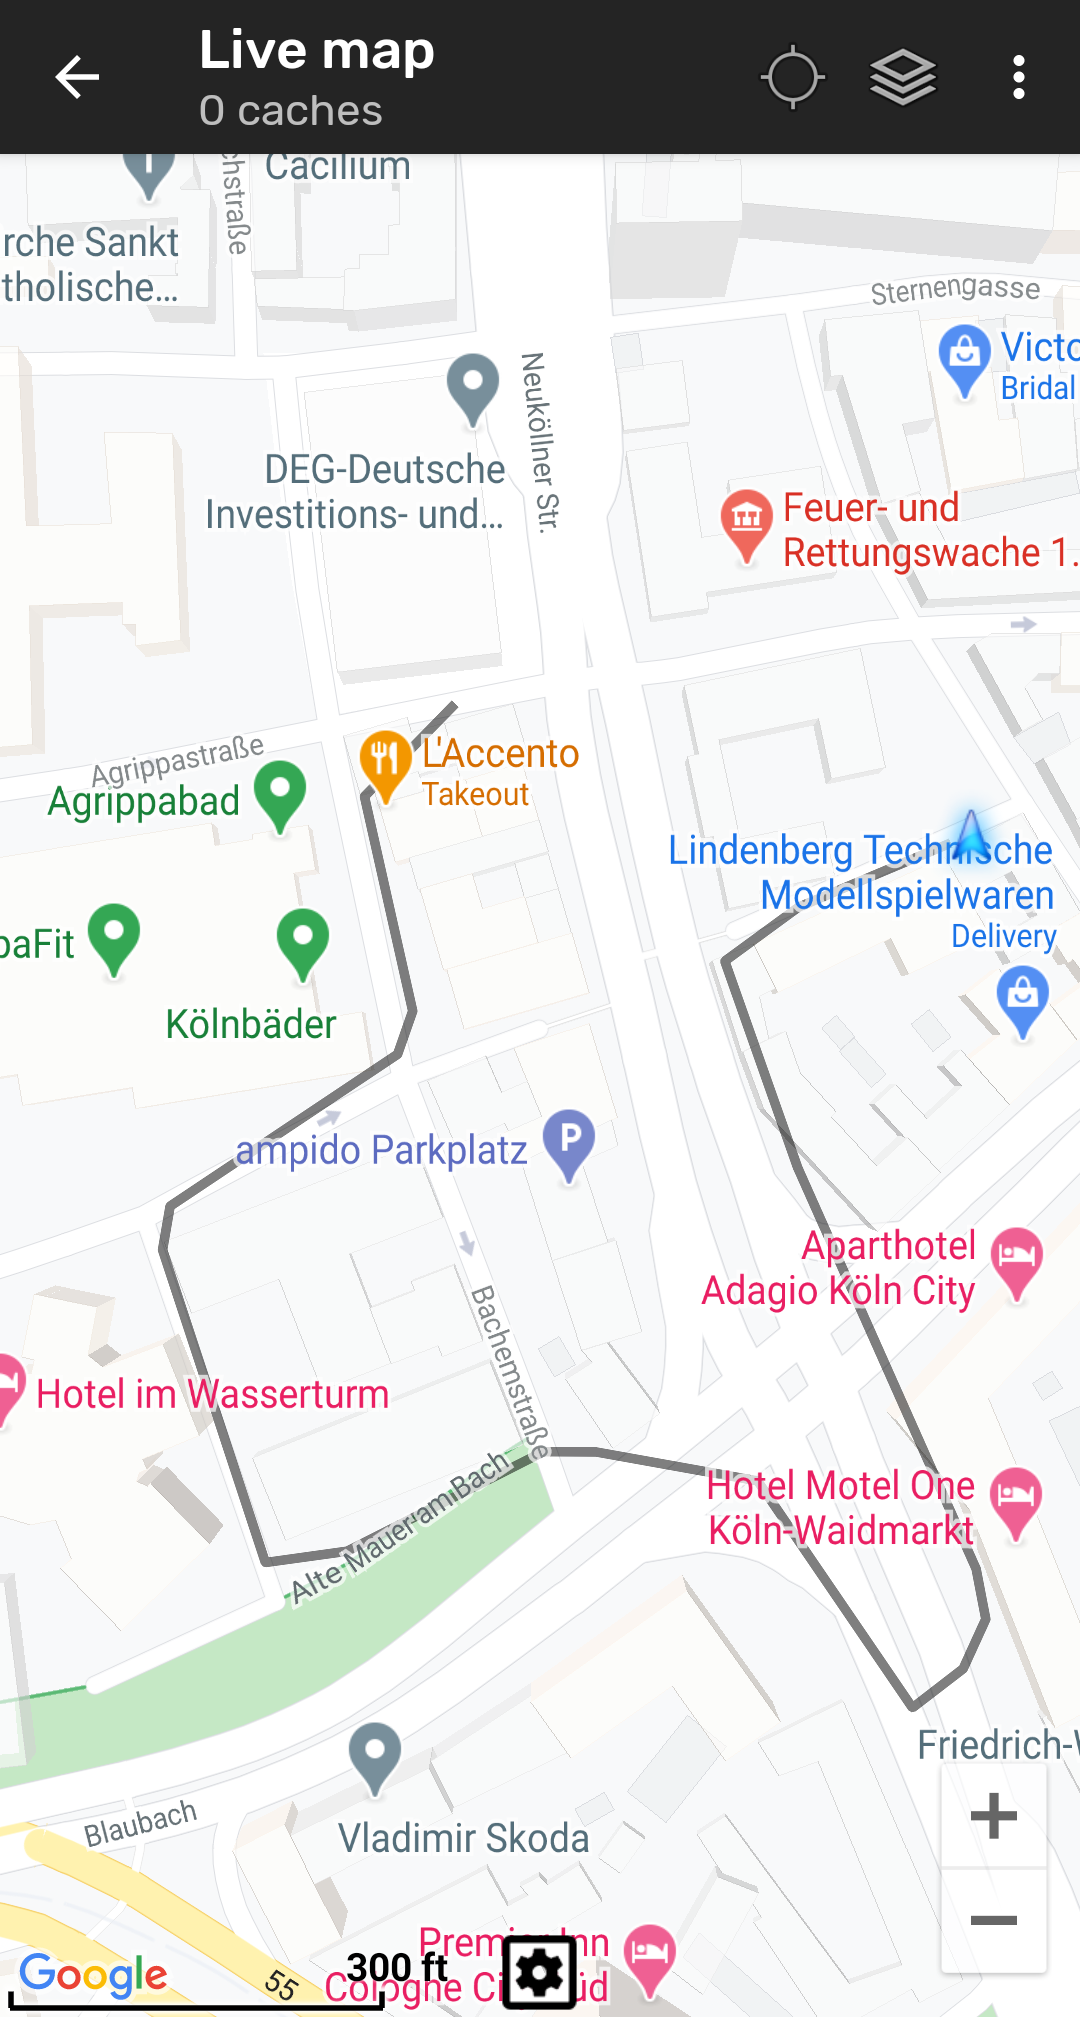
Individual route
An individual route can be created by long tapping several caches/waypoints on the (live) map. A route will then be drawn between each of the selected caches/waypoints in sequence of your selection. This allows you to create a custom route between caches and can be e.g. used to plan your caching trip.
To make use of the individual route feature you need to enable the long tap function on the map in your map behavior settings.
The route points will either be connected by a straight line or a routed line if you have BRouter installed and configured. Using BRouter for this function is highly recommended to get the most out of it.
The default line color is blue but the line color and additional parameters can be configured according to your needs within the map line customization settings.
The example below shows the typical appearance of an individual route.

While you can add and remove caches/waypoints to/from your rote by long tapping them, there are also some additional functions, which can be found below the menu item Individual route in your map menu:
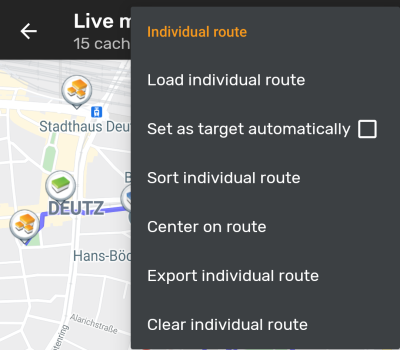
| Menu item | Description |
|---|---|
| Load individual route | Load a previously saved individual route. |
| Set as target automatically | If activated the routing start point will be set as direction line target automatically (showing the way from your position to the starting point of the route). This can be handy while doing a geocaching tour. Long-tap on a visited cache/waypoint will remove it from your individual route, and with this option activated, your next stop on your route will be set as target automatically. |
| Sort individual route | Will open a dialog, where you can modify the sequence or remove one or more of the selected caches/waypoints on your route; The route will then be recalculated accordingly. Don't forget to hit the “save” button to save your changes to the individual route, or just leave the dialog to discard them. Long tap on the title or detail allows you to move the cache/waypoint and its successors to the top of the route. |
| Center on route | Will move/zoom the map, so that an the individual route is shown completely. |
| Export individual route | You can export your created individual route into a GPX route file. |
| Clear individual route | This will remove the created individual route. |
History track
The history track provides a line of your position history (your movement) on the map. You have to activate the history track in your map content settings, where you can also configure additional parameters (such as maximum length of the track).
The default line color is black but the line color and additional appearance parameters can be configured according to your needs within the map line customization settings.
The example below shows the typical appearance of a history track line.
To configure the history track you can use the map menu items below History track in your map menu:
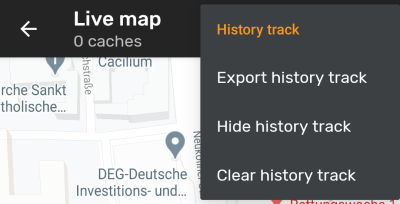
| Menu item | Description |
|---|---|
| Export history track | Allows you to export your position history to a GPX track file. |
| Hide/Show history track | Using this option you can turn the history track off/on. Turning it off will not clear the existing track but just stop recording and hide it. |
| Clear history track | This will clear the position history and thus remove the existing track. |
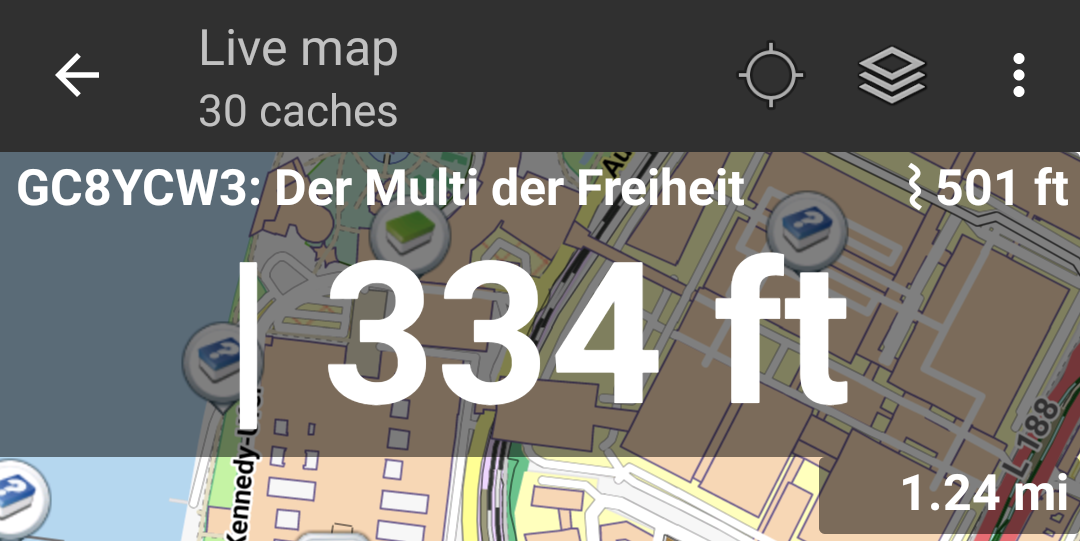
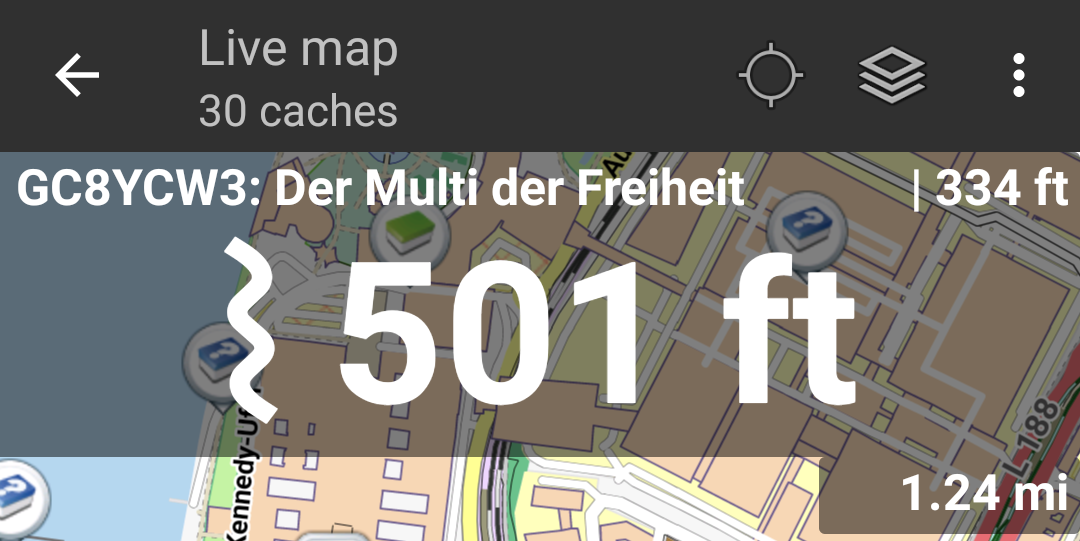
Distance information
While using the direction line and/or individual route c:geo will also provide several distance figures at the top of the map (can also be seen in the dedicated screenshots above). The distances are shown in meter/kilometer or feet/mile depending on your settings.
Depending on whether you use one or both lines and whether you activated to show the straight distance in addition to the routed distance (only if Brouter is installed) in your map content settings several distance figures might be shown.
The picture below shows a combination of all possible distance figures. Additionally the chosen target cache/waypoint is shown on top left is the direction line is active.
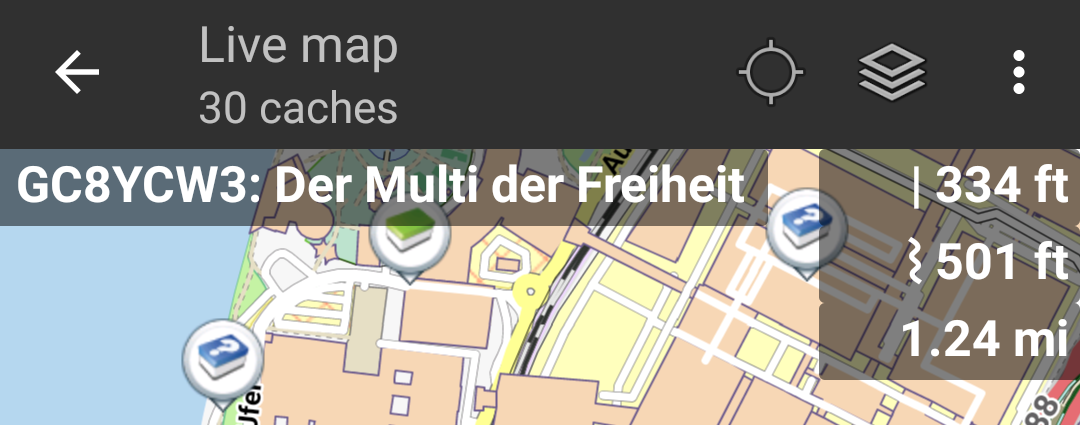
Some or all of these distance figures might be shown depending on configuration and active navigation lines:
- The first figure is the straight line distance for the direction line (i.e. straight distance between your current position and the chosen target cache/waypoint). The icon in front represents therefore the straight line if both routed and straight line distances are shown.
- The second figure is the routed line distance for the direction line (i.e. the distance between your position and the chosen target cache/waypoint according to the BRouter routing information). The icon in front represents therefore the routed line if both routed and straight line distances are shown.
- The third figure is the length of your individual route.
For better visibility you can tap on the distances to supersize them and reduce them again. If straight and routed distances are shown each tap will let you cycle between straight distance enlarged, routed distance enlarged or normal view.